 2. Integrating the SDK Reference
Integrating the SDK
Prerequisites
- Xcode 11.3.1 or later
- An iOS device running iOS 13.3.1 or later
- A valid Wavecell developer account (TBD)
Set up the development environment
In this section, we will create an iOS project, and integrate the Wavecell SDK into the project.
Create an iOS project
Now, let’s build an iOS project from scratch.
- Open Xcode and click Create a new Xcode project.
- Choose Single View App as the template and click Next.
- Choose the folder where to store the project and click Create.
Go to the
TARGETS > Project Name > General > Signingmenu, chooseAutomatically manage signing, and then clickEnable Automaticon the pop-up window.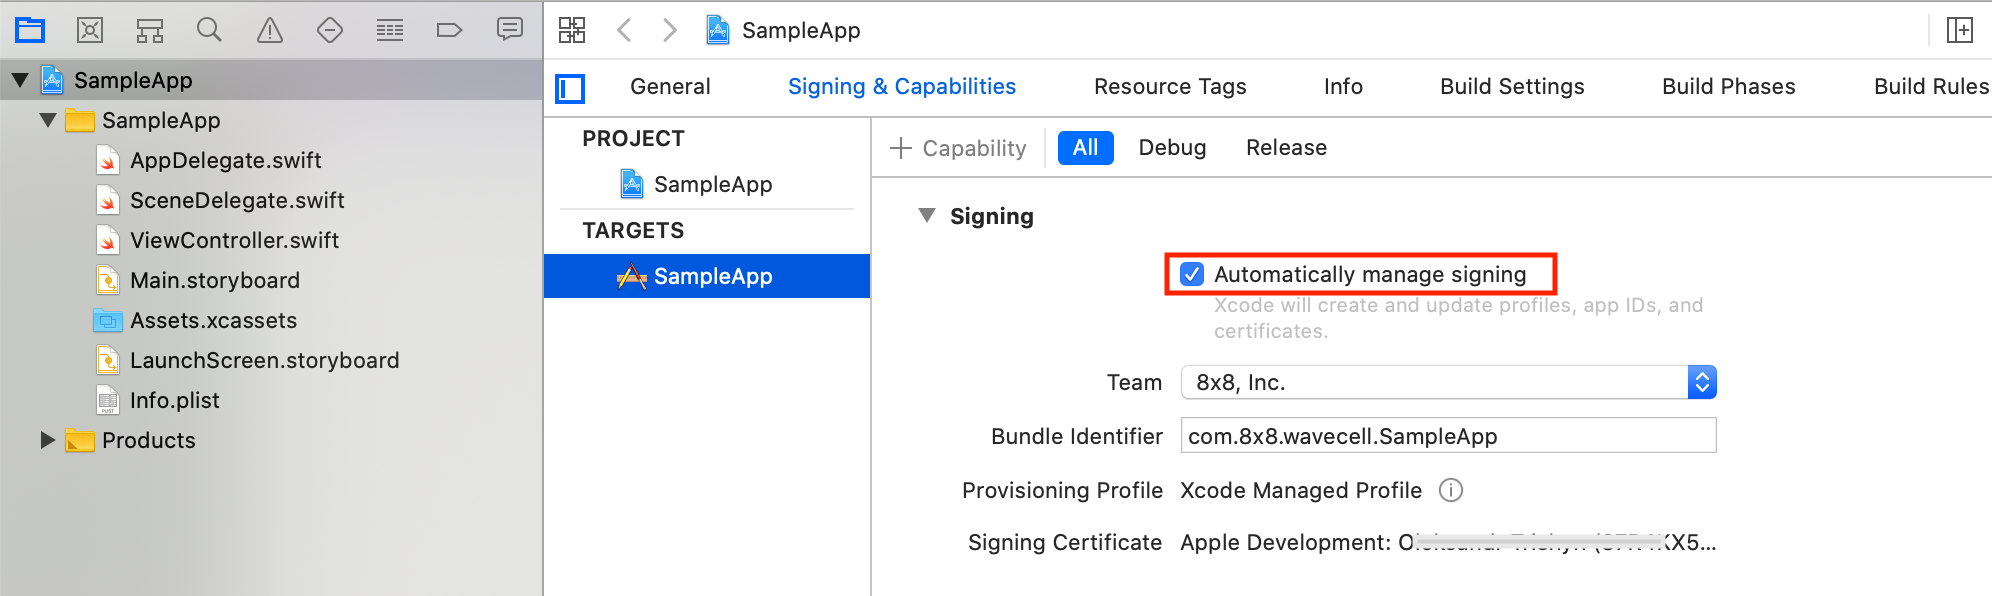
Integrate the SDK
Go to SDK Downloads, download the latest version of the Wavecell SDK for iOS, and unzip the downloaded SDK package.
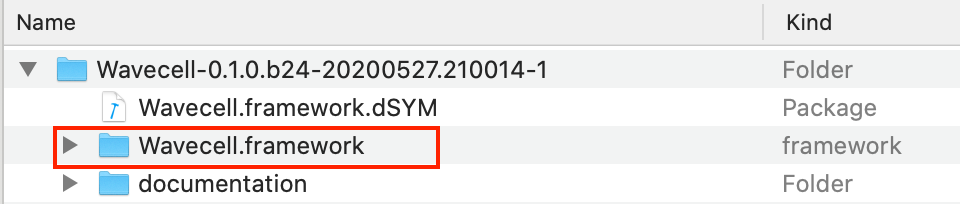
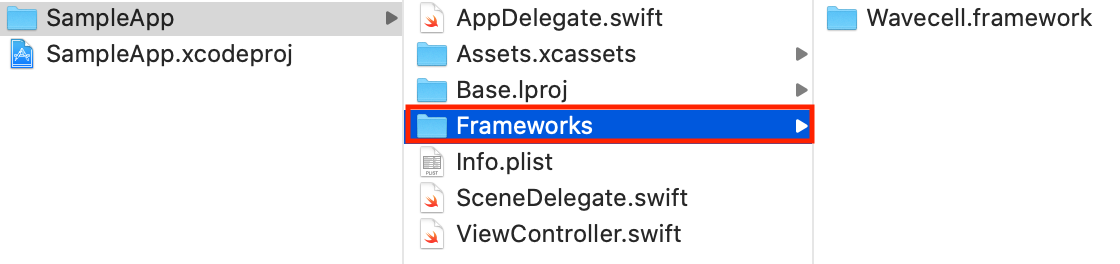
Copy Wavecell.framework bundle to Frameworks folder.
Go to the
TARGETS > Project Name > General > Frameworks, Libraries, and Embedded Contentmenu.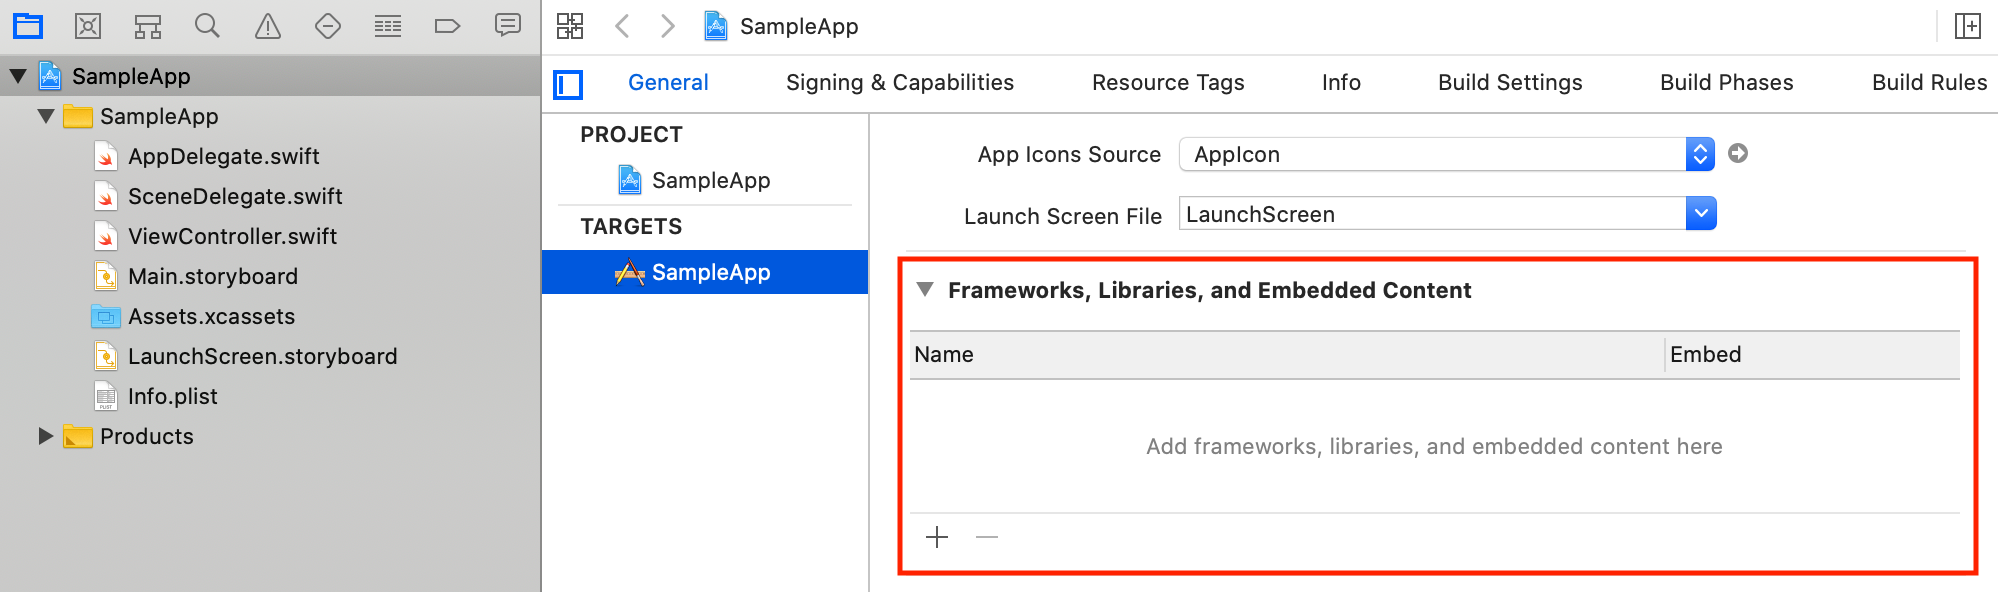
Drag the Wavecell.framework bundle from the Frameworks folder into the
Frameworks, Libraries, and Embedded Contentsection.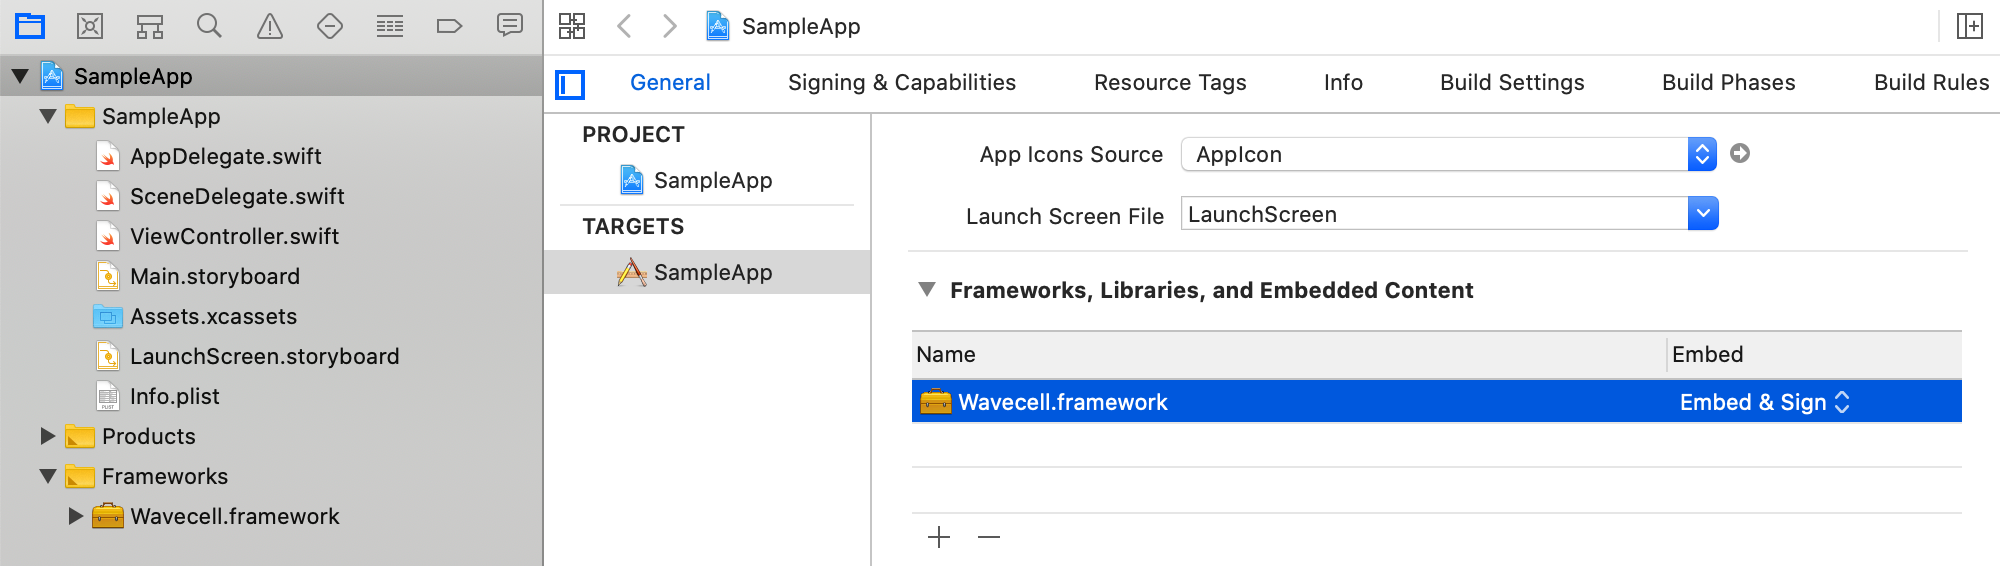
Enable VoIP capabilities
Go to the
TARGETS > Project Name > Signing & Capabilitiesand addBackground Modes. EnableAudio, AirPlay,…andVoice over IPthere.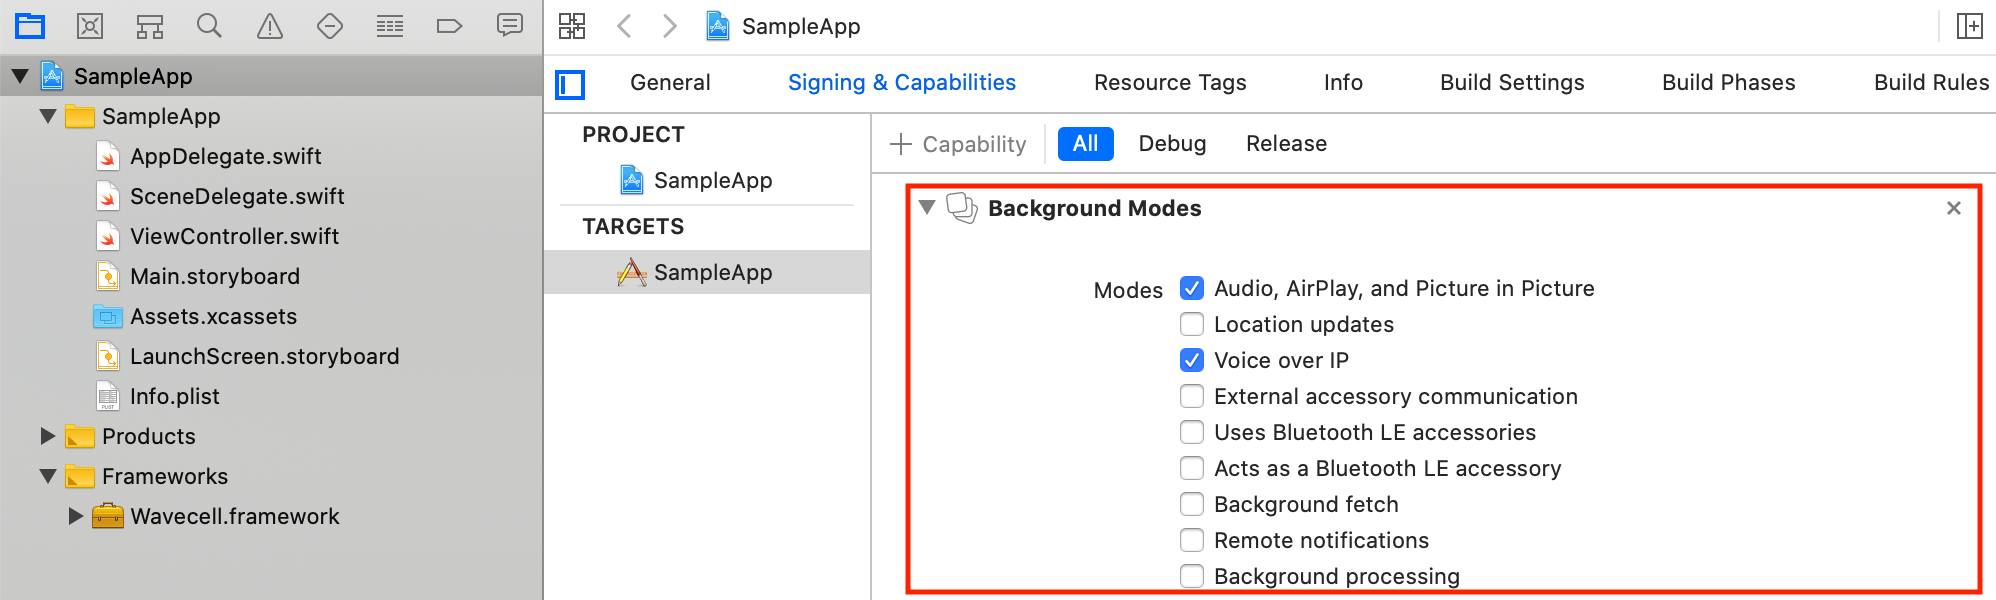
Go to the
TARGETS > Project Name > Signing & Capabilitiesand addPush Notifications. This step is only required for receiving incoming calls.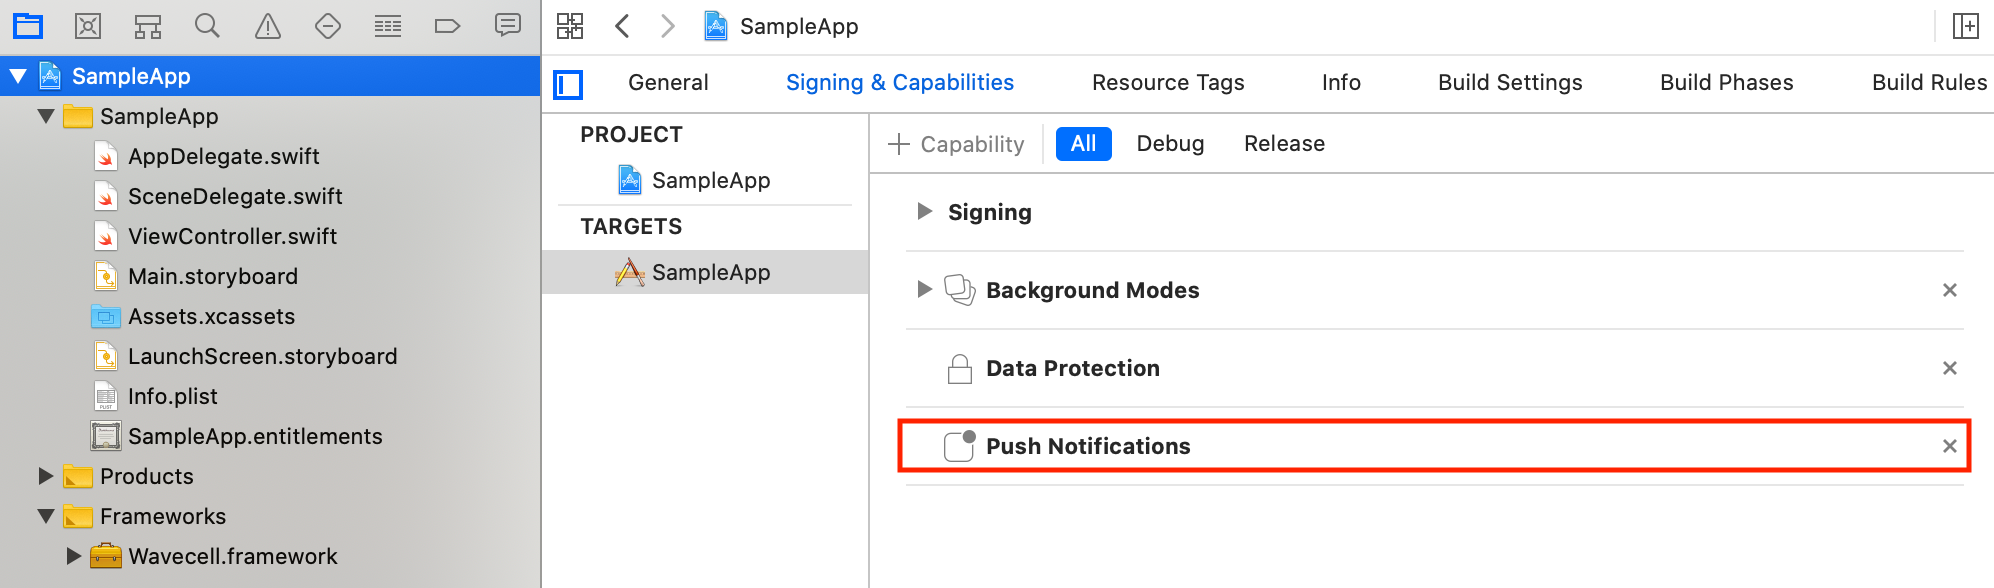
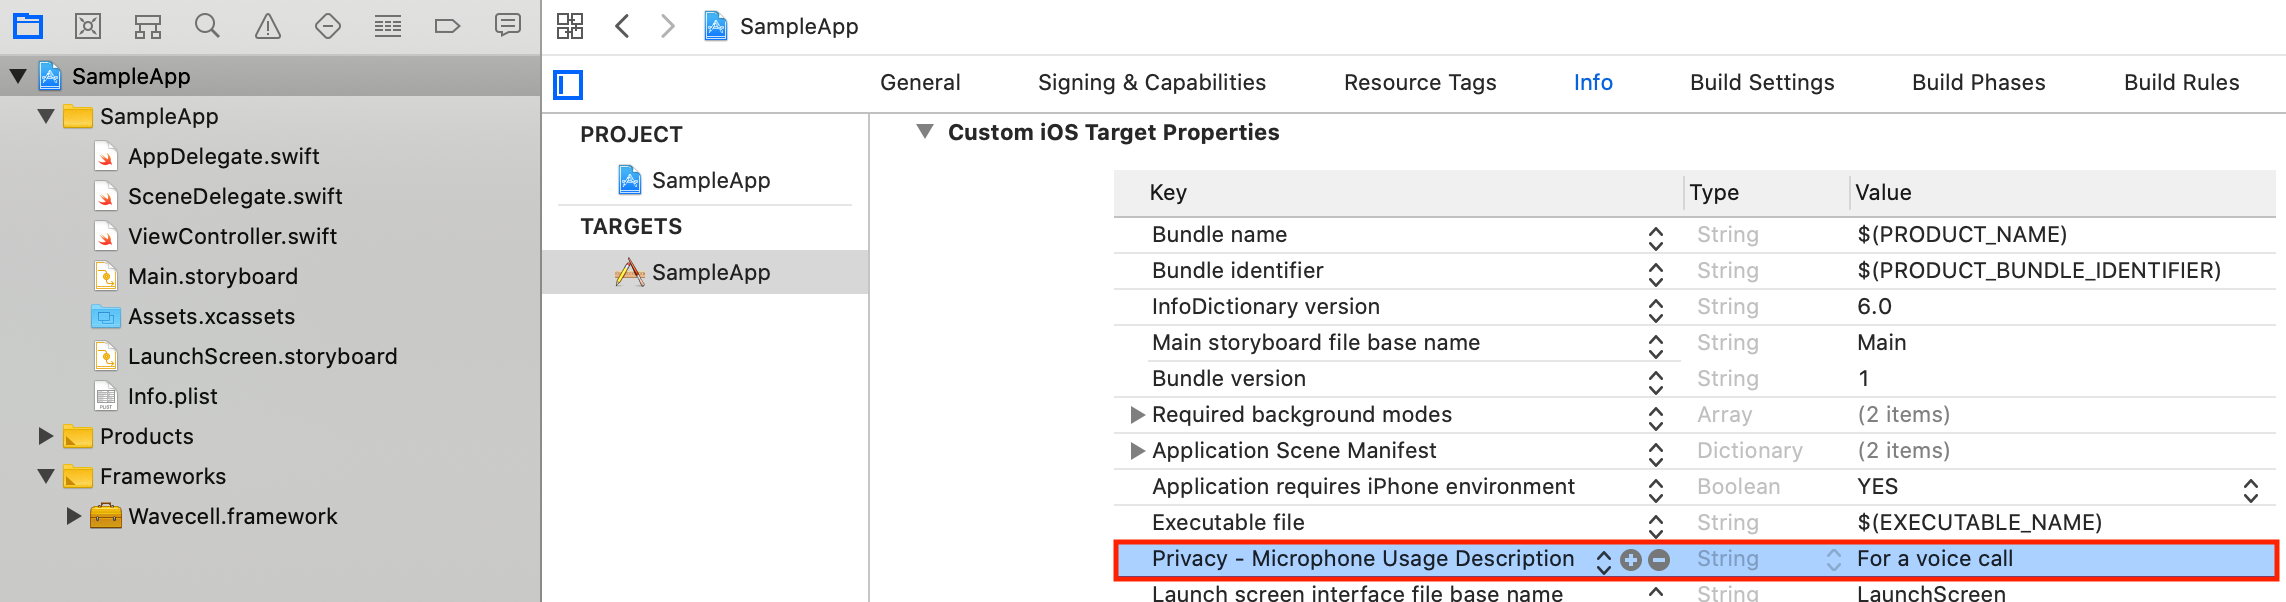
Go to the
TARGETS > Project Name > Infoand add privacy description for microphone usage.NSMicrophoneUsageDescription describes the reason your app accesses the microphone. When the system prompts the user to allow access, this string is displayed as part of the alert, and it cannot be left empty.
Disable Bitcode
Bitcode is an Apple technology that enables app recompilation in order to reduce its size.
Wavecell.framework is built without bitcode which in turn implies that restriction to application.
Go to the
TARGETS > Project Name > Build Settingsand setEnable BitcodetoNo.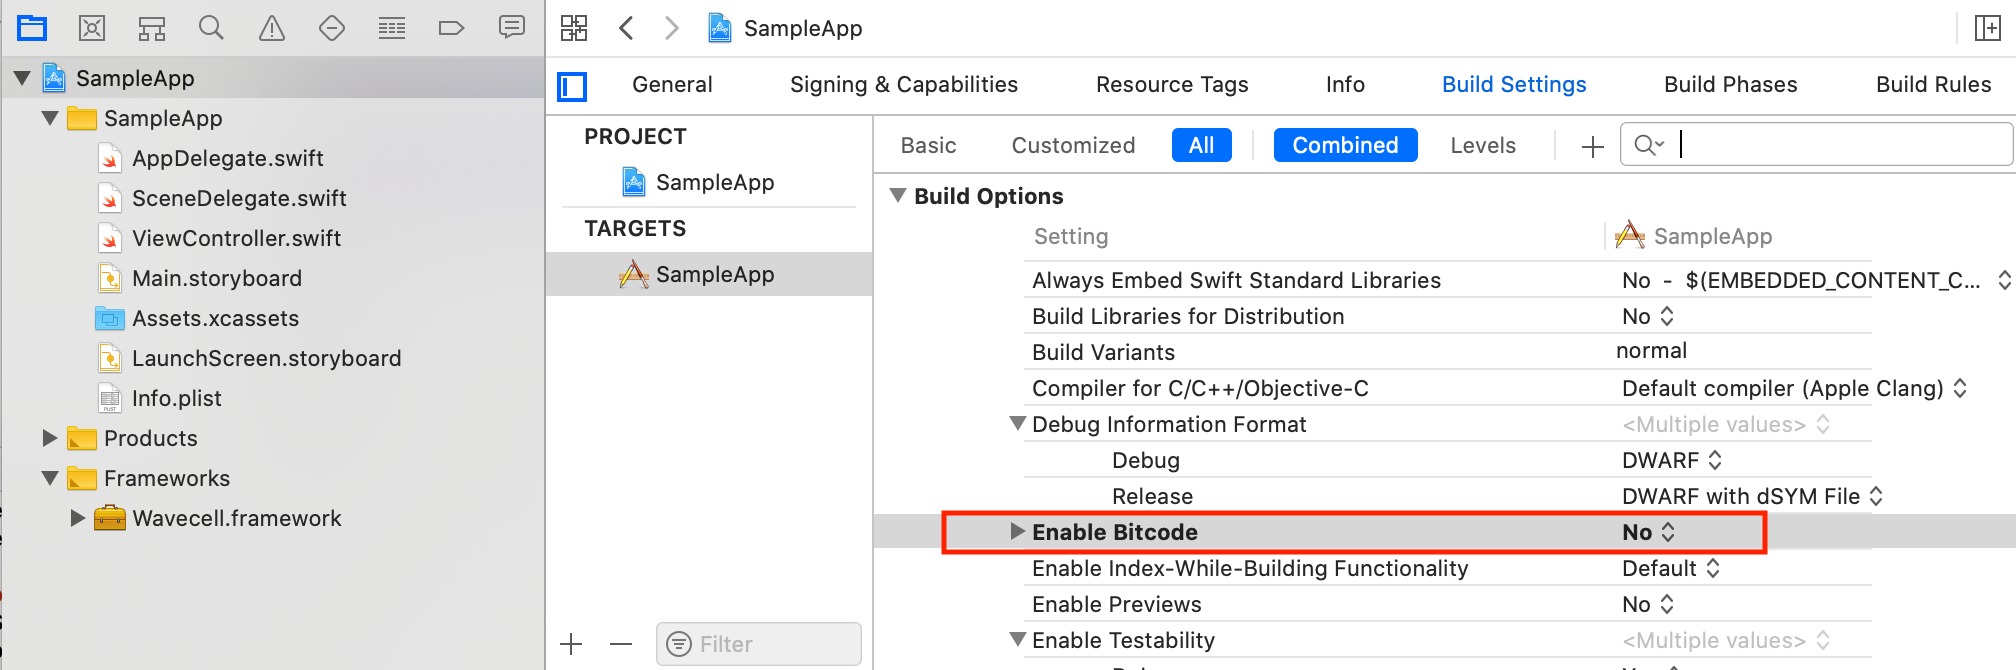
Build and run
Let’s verify if app can invoke functions from Wavecell.framework:
Modify
AppDelegate.swiftby adding the following lines:import Wavecell print("\(Wavecell.shared.version())")Build (Cmd+B) and Run (Cmd+R) the app project
If everything goes well Xcode console will have a message similar to:
0.1.0b24-r11d3b9e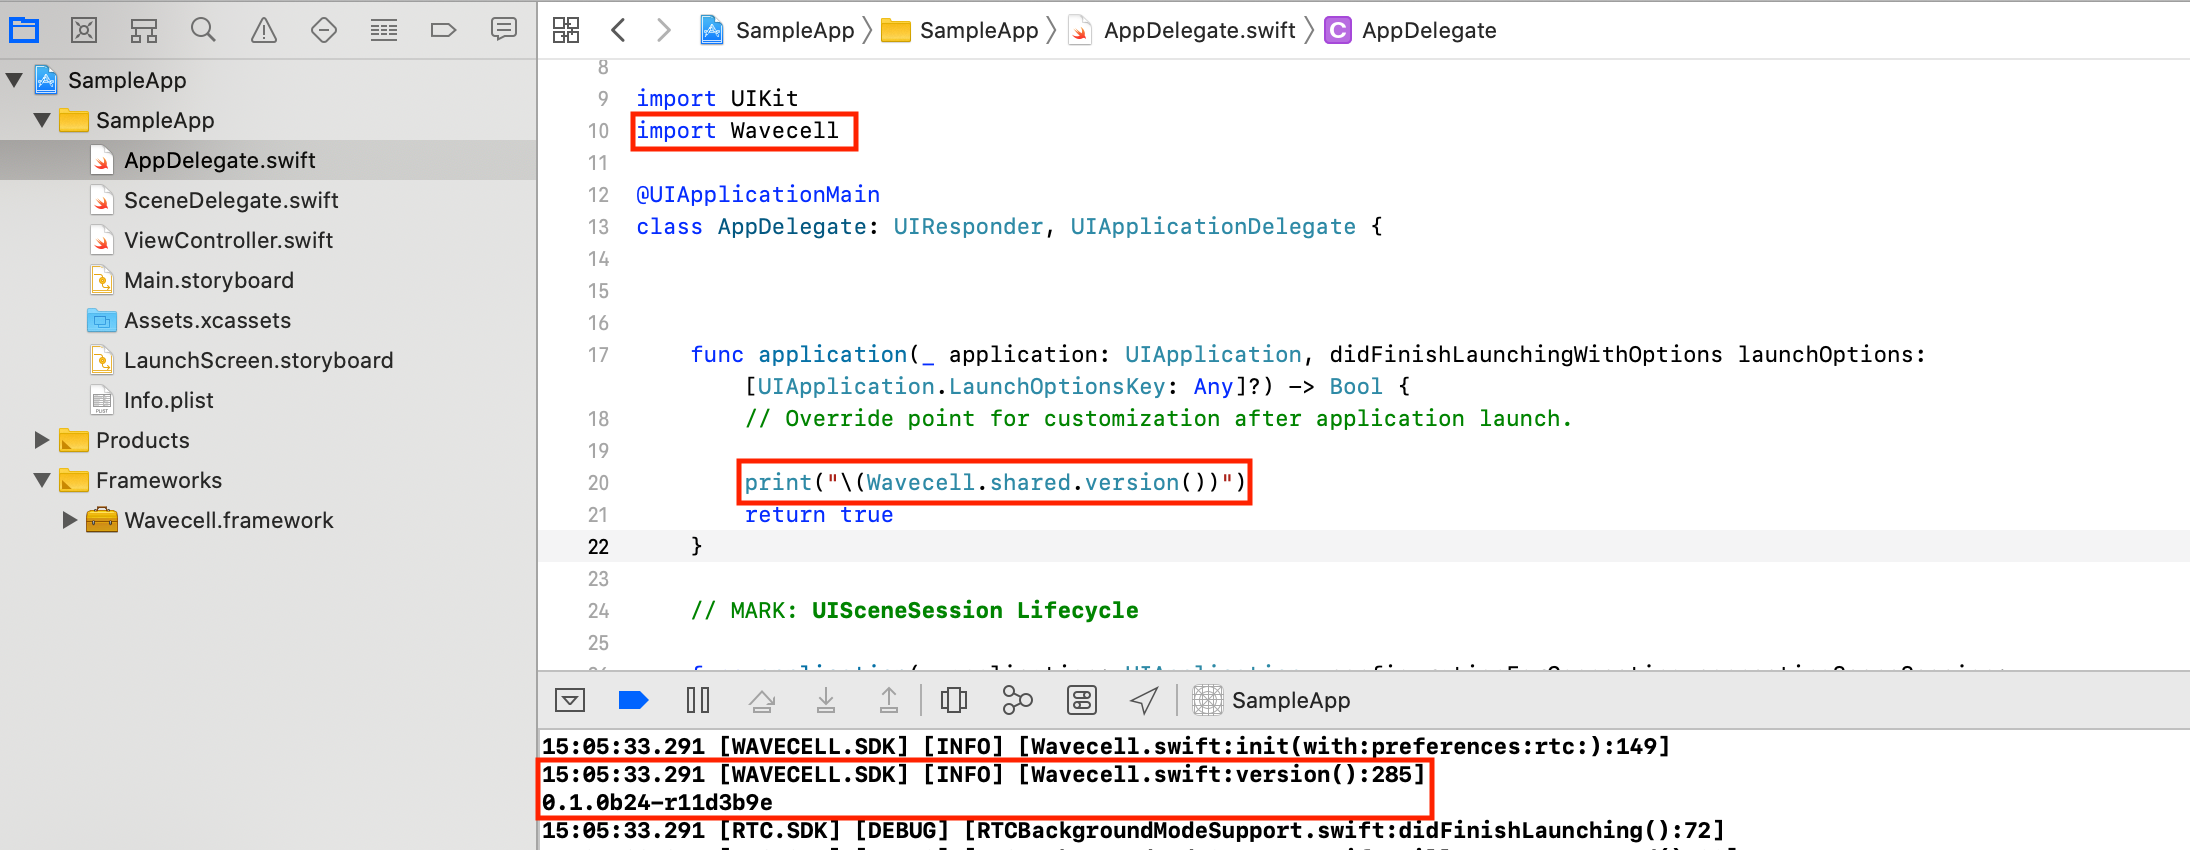
Push notification setup
Wavecell backend solution includes the notification server. The notification server establishes secure connection with APNS in order to send push notifcations to your application.
There are two types of secure connections:
Wavecell backend supports both of them.

Certificate-based
For this type of connection please generate VoIP Service Certificate at Apple developer account.

Once certificate is ready click Download and save it to your hard drive (
voip_services.cerfile).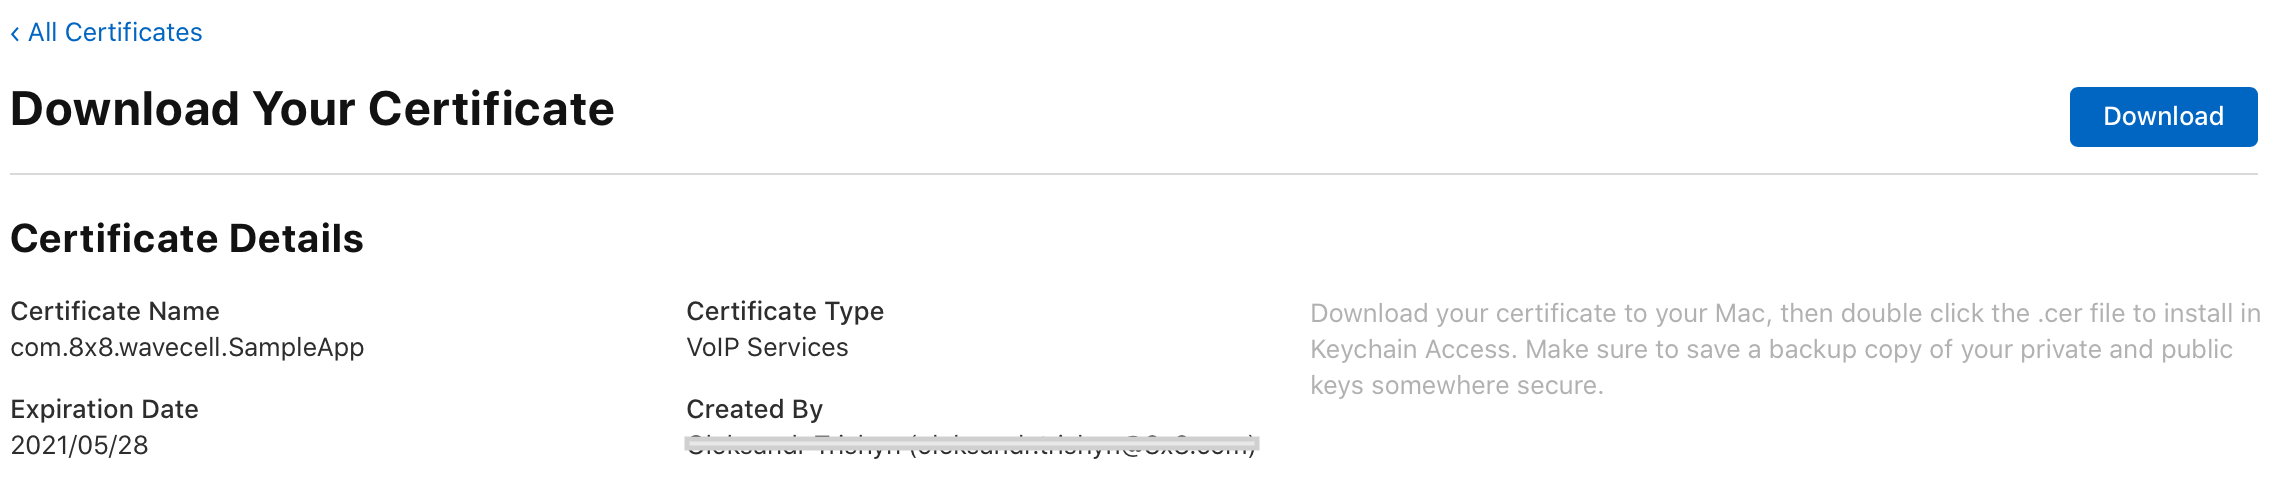
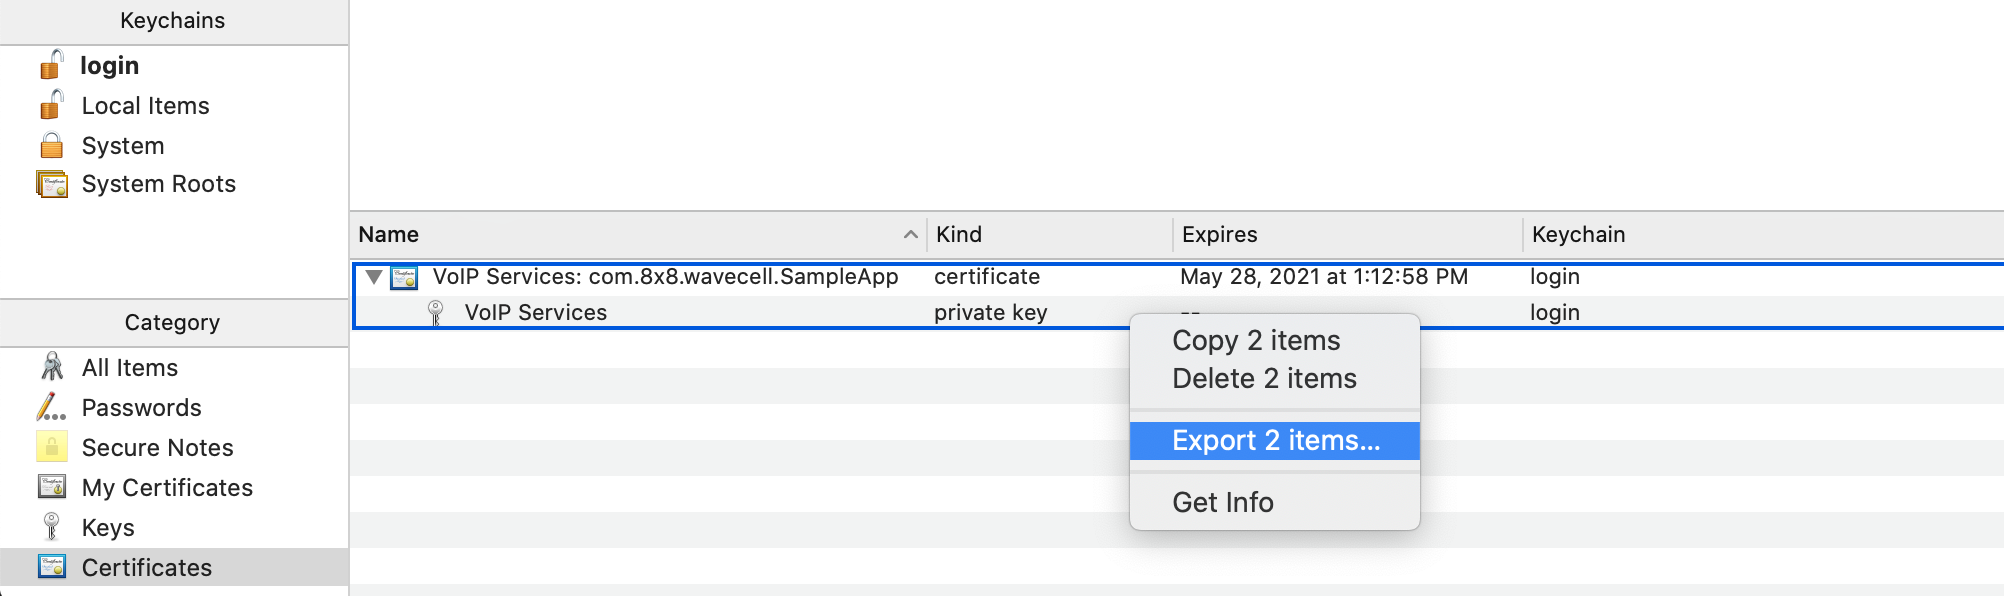
Open the
voip_services.cerfile with Keychain Access app on your computer. If you are asked which keychain to add the certificate to, select login option.In Keychain Access app, select Certificates option in the bottom section of the left sidebar. You will now need to find the certificate you have created.
Export your Certificate as a .p12 file.
Convert .p12 file to .pem using the
opensslcommand in Terminal:openssl pkcs12 -in PATH_TO_YOUR_P12 -nokeys -out cert.pem -nodes openssl pkcs12 -in PATH_TO_YOUR_P12 -nocerts -out key.pem -nodes openssl rsa -in key.pem -out key.pem cat cert.pem key.pem > apns-voip-services.pemRegister the
Certificate(apns-voip-services.pemfile) at Wavecell developer account.
Token-based
For token-base connection you will need to generate a key at Apple developer account with Apple Push Notification Service enabled.
- Once key is ready click Download and save it to your hard drive (
AuthKey_<Key ID>.p8file). - Register the
Key IDandKey(.p8 file) at Wavecell developer account.